
Complete Fence Project Planning Checklist for Homeowners

Key Highlights
Start every fence project by defining your goal, budget, and preferred fence design.
Confirm property boundaries early so your fence installation follows the right fence line.
Review permits, HOA rules, and local height limits before work begins.
Compare fence materials based on upkeep, appearance, and long-term value.
Choose an experienced contractor who can guide planning, approvals, and installation.
Build your schedule around lead times, utility lines, weather conditions, and yard preparation.
Introduction
Planning a new fence can feel harder than expected. You need to think about fence installation, property lines, style, cost, approvals, and timing before work even starts. That is why a clear fence planning checklist matters. If you are a homeowner in Columbus, Ohio, or nearby areas like Gahanna, Bexley, Pickerington, or Worthington, strong project planning helps you avoid confusion and move forward with more confidence.
Understanding the Importance of Fence Project Planning
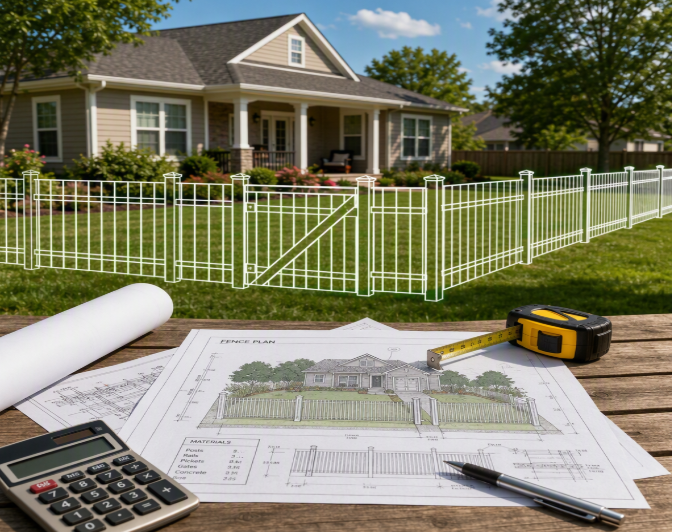
A fence project involves more than picking a style you like. Proper planning helps you understand layout, materials, schedule, and the fence permit approval process before crews arrive.
It also helps you prepare the necessary permits and HOA documents that may be required in residential areas. When you know the steps upfront, your project is easier to manage. The next sections explain how planning protects your budget and your property.
How Proper Planning Prevents Delays and Unexpected Costs
A well-planned fence project reduces surprises. When you set goals early, measure the fence area, and review site conditions, you get a clearer picture of the initial cost. That includes materials, layout needs, gates, and the amount of labor required for installation.
Good preparation also helps control labor costs. Slopes, trees, utilities, and an old fence can affect the job scope. If these details are missed during planning, crews may need extra time or changes in the field, which can slow progress and increase expense.
Another benefit is avoiding costly repairs later. Choosing the right fence type for your needs, yard, and upkeep expectations lowers the chance of early problems. Clear planning supports better decisions from the first step through installation day.
Avoiding Common Permit and Boundary Issues with Careful Preparation
Many fence problems start before installation begins. Permit requirements, HOA rules, and unclear property lines can stop a project or force changes after materials are ordered. Careful project planning helps you catch these issues early.
A copy of your plot of survey is one of the most important documents to gather. It shows property boundaries and structures, which helps determine where the fence line can go. Without it, homeowners may place a fence too close to a line or in the wrong area.
Preparation also helps with approvals. Most municipalities require a drawn fence plan and survey for review, and HOA boards often need separate approval. These steps can take days or even several weeks, so early action prevents avoidable delays.
Quick Fence Planning Checklist Summary (TL;DR)
This fence planning checklist gives you a simple path to follow before starting a fence project. Focus on your purpose, measurements, budget, approvals, contractor choice, and installation timing so fewer details get missed.
In short, choose the fence type that fits your needs, confirm boundaries, review permits, compare fence materials, and prepare your yard. Most fence installations take 1-2 days once scheduled, but lead times for approvals and materials should be part of your plan.
Snapshot of the Essential Steps for Homeowners
Before fence installation starts, homeowners need a fence checklist that covers the key decisions in order. This keeps the project clear and helps avoid missed steps.
Use this snapshot as a starting point:
Define the purpose of the fence and the areas you want to enclose.
Confirm property boundaries with your plat of survey.
Review fence style, gates, and layout options.
Compare materials based on upkeep and appearance.
Request an estimate and review the expected project scope.
Check necessary permits and HOA approval needs.
Prepare the yard and utility lines before installation.
These steps give structure to the process. When you move through them one by one, planning becomes more manageable and your contractor can guide the next actions with fewer setbacks.
Why a Checklist Saves Time and Money
A checklist saves time because it puts proper planning first. Instead of making decisions during the job, you handle the major details before installation is scheduled. That means fewer changes and fewer pauses.
It also helps protect the cost of your new fence. When measurements, approvals, and material choices are handled early, you are less likely to run into added labor costs or rework.
A checklist helps you:
Catch missing documents before they delay scheduling.
Spot site issues like utilities, slopes, or landscaping.
Compare options that fit your budget and maintenance goals.
Make faster decisions during your estimate appointment.
That is why this fence planning checklist guide is useful for first-time homeowners and experienced property owners alike.
Beginner’s Guide: Getting Ready for Your Fence Project
If you are a first-time homeowner, your fence project may bring up questions you have never had to answer before. You need to know why you want a fence, where it can go, and which fence options fit your property.
You also need to prepare documents, review restrictions, and understand the steps before fence installation begins. This fence planning checklist explained below will help you get organized before you request estimates or commit to a design.
What Every First-Time Homeowner Should Know Before Starting
First, know your reason for building a fence. Some homeowners want privacy, some want better security, and others want curb appeal or a safe space for dogs. That goal affects the fence style, height, and layout you should consider.
Next, understand that property boundaries matter just as much as design. A fence should follow approved placement, not guesses about where your lot ends. A plot of survey helps confirm where installation can happen and supports permit review.
It also helps to know that planning includes more than choosing materials. You may need HOA approval, city review, utility marking, and yard preparation before crews arrive. For many homeowners, having an experienced local company manage these steps makes the process much easier.
Essential Tools, Documents, and Resources to Gather
Before requesting installation, gather the documents and information that support planning. You do not need every proper tool used by installers, but you do need the right paperwork and site details.
Start with these items:
A copy of your plat of survey
Your preferred fence layout ideas
Notes about utility lines and private utilities
HOA rules or board submission requirements
Any city or township permit details
Gate location preferences
Questions about budget, upkeep, and style
These resources help the estimate appointment go smoothly. They also support the fence permit approval process, since municipalities often require a drawn fence plan and survey. This fence planning checklist tips section is simple: gather documents early and ask questions before the schedule is set.
Step-by-Step Fence Project Planning Process
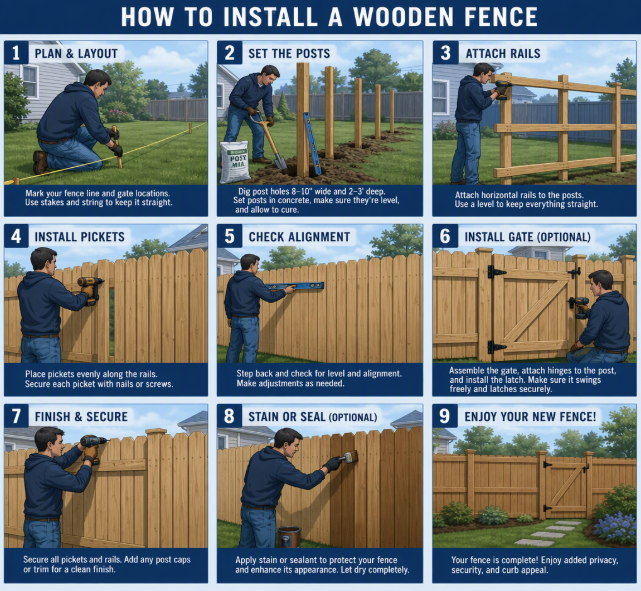
Now it is time to walk through the main process steps in order. A strong fence project plan should move from goals and measurements to design, budget, approvals, contractor selection, and scheduling.
This structure keeps fence installation organized and easier to manage. It also matches what homeowners need most at the awareness stage: a clear, practical checklist. Use the next steps as your core fence planning checklist guide.
Step 1: Define Your Purpose & Goals (Privacy, Security, Boundaries)
Every good plan starts with the purpose of your fence. That purpose shapes the height, material, layout, and gate placement. If your goal is unclear, it is hard to choose the right solution.
Ask yourself what matters most in your fence area:
More privacy in the backyard
Better security for kids or pets
Clear boundaries between spaces
Improved curb appeal
A privacy fence may fit one home, while a decorative or open design may fit another. Your goals should guide the rest of the project, including materials and budget. This is the first and most important part of any fence planning checklist explained for homeowners.
Step 2: Measure Your Property & Mark Boundaries Accurately
Accurate measurements protect your project from mistakes. You need to know where the fence layout can go and how much material the job will require. Guessing can lead to boundary issues, permit problems, and changes during installation.
Your plat of survey is the main document for confirming property boundaries and property lines. It shows the lot shape, structures, and usable areas. A contractor can use that information along with field verification to review slopes, trees, and other concerns.
Step 3: Choose the Right Fence Design & Material for Your Home
Once your goals and layout are clear, choose a fence design that fits your home and daily needs. Homeowners should look at appearance, upkeep, and how the fence will function in the yard.
Red Barn Fence Company offers several fence materials and styles, including:
Cedar for a classic wood fence look
Vinyl fences for lower maintenance
Aluminum for a clean, durable finish
Rail, agricultural, commercial, gates, and custom options
Some homeowners also compare options like chain link when researching fence materials, but the best fit depends on your priorities. A decorative fence can support curb appeal, while cedar or vinyl may be better when privacy matters. Match the style to the home, neighborhood feel, and expected maintenance level.
Step 4: Set a Realistic Budget and Request a Fence Estimate
Budgeting should cover more than materials alone. The initial cost may include gates, site conditions, removal of an existing fence, and labor costs tied to the project layout. A professional fence estimate helps bring those details into view.
During an estimate appointment, expect to discuss the following:
Why you need the fence
Your budget and maintenance goals
Building restrictions and layout needs
Gate style, hardware, and design details
This is the best way to understand the cost of your new fence. You should also know the payment process in advance. Some companies may take final payment upon completion, and if you pay by card, ask how credit card information is handled. Clear pricing conversations reduce stress later.
Step 5: Check Local Regulations, HOA Rules, and Permit Requirements
Before installation can be scheduled, many homeowners must address permit requirements and approval steps. Local regulations, HOA rules, and city building ordinances often affect fence placement, style, and height.
Review these items early:
Municipal permit requirements
HOA submission and board approval rules
Fence height limits and location restrictions
Drawn fence plan and survey requirements
In many cases, the permit process can take from a few days to four weeks, while HOA approval may take about two to four weeks. Red Barn Fence Company is known for handling permits and HOA approvals for customers, which can make this stage far easier for homeowners in the Columbus area.
Step 6: Select a Qualified Fence Contractor in Columbus, Ohio
Choosing the right fence contractor can shape the whole experience. You want a company that understands fence installation, local approvals, site conditions, and the needs of homeowners in your installation area.
Look for a contractor with:
Strong local experience
Clear communication during planning
In-house manufacturing or custom capabilities
Warranty support and a proven process
Red Barn Fence Company is a family-owned business with 40 years of experience serving Columbus, Gahanna, Bexley, Pickerington, and Worthington, Ohio. Their five-step process covers free estimate, planning and approvals, custom in-house manufacturing, site prep with utility line marking, and installation. A property owner or decision maker should also be available on installation day for layout review and final questions.
Step 7: Plan Your Installation Schedule and Prepare Your Yard
The final planning step is building a realistic installation schedule. Weather conditions can shift dates, and scheduling usually happens after documents are complete and materials are ready. Once underway, most residential fence jobs take about 1-2 days depending on project complexity.
When preparing your yard, make sure you:
Mark or disclose private utilities like drain tiles, sprinkler systems, and electrical lines
Trim or move landscaping near the fence line
Notify nearby neighbors about upcoming work
Be home at the start and end of installation
Crews may need access to water and electricity, and digging for post holes can leave dirt or muddy areas behind. These fence planning checklist tips help reduce surprises and support a smoother installation day.
Common Mistakes to Avoid When Planning Your Fence Project
Many common mistakes happen when homeowners move too fast. They may choose a design before checking property lines, skip permit questions, or forget how site conditions can affect labor costs. These issues can slow the project and create stress.
Another problem is underestimating long-term needs. A low upfront price may not be the best value if the material requires more upkeep or leads to costly repairs. Strong planning helps you compare options with a full view of installation, approvals, and maintenance before making a final decision.
Overlooking Permits, Ignoring Property Lines, and Underestimating Costs
Three planning mistakes cause many fence delays: missing permits, unclear property lines, and unrealistic budgeting. Each one can affect timing, placement, and the total project experience. Good project planning helps prevent all three.
Watch for these issues:
Starting design choices before reviewing permits
Assuming old fence placement matches legal property lines
Looking only at the initial cost and not the full scope
Forgetting utilities, gates, or removal needs
A simple fix is to slow down and follow a checklist. Gather your survey, ask about approvals, and request a detailed estimate before scheduling. That approach protects your investment and reduces the chance of changes after work begins.
Conclusion
In conclusion, embarking on a fence project can feel overwhelming, but with a structured planning checklist, you can simplify the process and avoid common pitfalls. By defining your goals, measuring your property accurately, and understanding local regulations, you set the stage for a successful installation. Remember, careful planning not only saves time but also helps you stay within budget and ensures compliance with HOA and permit requirements. If you're ready to take the next step toward enhancing your home's security and aesthetics, contact us at Red Barn Fence Company for a free quote. With our 40 years of experience serving Columbus and surrounding areas, we are here to guide you every step of the way.
Frequently Asked Questions
What should be included in a fence planning checklist?
A fence planning checklist should include your project goals, property lines, measurements, fence style, material choice, budget, contractor selection, and yard prep. It should also cover the fence permit approval process, HOA review if needed, and a basic fence installation schedule so nothing important gets missed.
Do I need a permit or approval before installing a fence in Ohio?
Many Ohio fence projects require permit approval, especially when local regulations or city building ordinances apply. If you live in an HOA community, board approval may also be needed. Permit requirements vary by municipality, so homeowners should check local rules early before scheduling fence installation.
How do I estimate the total cost of a new fence?
To estimate the total cost of a new fence, review the initial cost of fence materials, gate needs, site conditions, and labor costs. The best next step is to request a professional fence estimate. That gives you a clearer price based on your layout, design, and installation requirements.
How early should I start planning my fence installation?
Start project planning as early as possible, ideally before you want the work done. Proper planning gives you time to gather documents, review approvals, and schedule around weather conditions. Since permits can take days or weeks, early preparation helps avoid delays and keeps installation on track.
